Draytek ARP address mismatch

I’ve previously had an issue with clients not being able to connect and ARP address mismatch showing in the logs.This happens when the source mac address doesn’t match ARP senders mac address. This was resolved by accessing the Draytek via telnet and executing.

ip arp accept 1

Which will return

Accept illegal ARP source mac REPLY packets

Continue Reading

Owncloud Webdav cp: cannot create regular file `/mnt/shared/documents/file.txt’: Invalid argument

trying to cp a file to a webdav mounted owncloud share from my linux machine failed wth the following error

cp: cannot create regular file `/mnt/shared/documents/file.txt': Invalid argument

However I was still able to copy from owncloud to my box. checking /var/www/owncloud/data/owncloud.log showed

{"app":"webdav","message":"Sabre\DAV\Exception\BadRequest: expected filesize 162 got 0","level":4,"time":"2015-04-24T13:15:31+00:00"}

To fix this issue open /etc/davfs2/davfs2.conf and change

# use_locks 1
to
use_locks 0

unmount and remount your share and you should be be able to copy with no errors.

Continue Reading

4.3″ 5V Monitor For The Raspberry Pi

I was looking for a 5v monitor for my Pi for use in the car but the ones are found seemed to be very expensive, undeterred I set about buying a 12v and adapting it to my needs.

I found one on Amazon for £12.46 which seemed to fit the bill perfectly. Described as

BW® 4.3” Color TFT Car Monitor Support 480 x 272 Resolution + Car Rear-view Mirror System Monitor, Mini Monitor for Car / Automobile

Digital color TFT LCD car rearview monitor,4.3 inch TFT LCD Screen Size, 480 x 272 Resolution,16 : 9 Display Format
It is with high quality and good durability,With small appearance,convenient for carry,Support 2-channel video input(V1, V2).
It Support multi-role display,With high definition for good image,With a stand holder which has adhesive sticker in the bottom for sticking it in the car.
It Support automatically startup detection when reserving,It can connect with reversing camera, DVD, VCD etc.
It is installed in the drive foreground,Video system: NTSC / PAL auto switchable,Display black screen on no signal,Visible area: 72 x 53 mm.

Ok so at 480 x 272 not mega resolution but perfectly useable to my console command line based application.

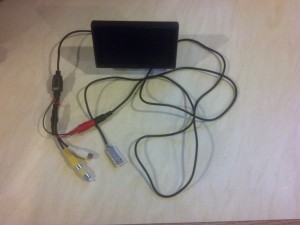
Contents of the box was the monitor with hard wired phono audio and video cables and a socket based power connector with inline fuse. Also was a sperate jack plug with bare red and black wires for connecting to your power source.
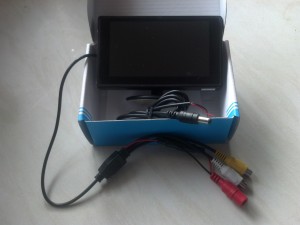
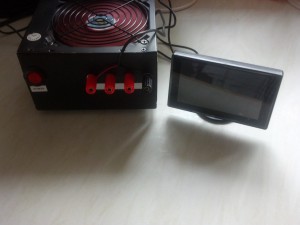
I thought I would power it up just to make sure it worked before taking it apart, plugged into my home made bench psu and nothing?
I put my multimeter on it to make sure the psu was working properly and it was?
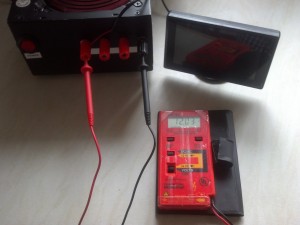
I then plugged in my Pi and the screen sprung into life.

It seems a 1p bulb is too much to ask for on a £12 monitor.

**** WARNING MAKING THE FOLLOWING CHANGES WILL OBVIOUSLY INVALIDATE ANY WARRANTY ETC, CONTINUE AT YOUR OWN RISK, I ACCEPT NO RESPONSIBILITY IF ANY OF YOUR EQUIPMENT BREAKS/CATCHES FIRE ETC ****

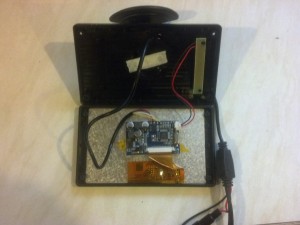
Removing the four small screws on the rear and opening the case revealed a simple circuit board.
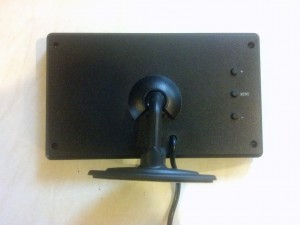
After some digging around with the multimeter I found a 5v supply on the CHMC 8AY 1508-AD chip.

I removed the red feed wire from it’s currently location onto the 5v leg of the chip and added some electrical tape for strain relief.
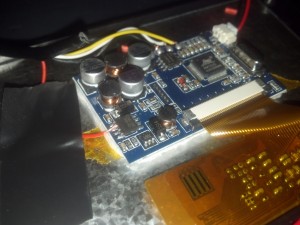
Now time for the test (fingers crossed)
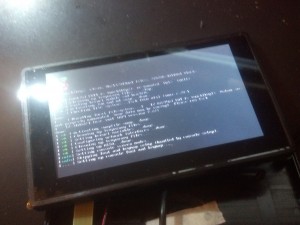
Great it powered up fine.

Wanting to run off a usb cigarette adapter in the car I added a USB connector to the bare red/black wires of the jack plug,
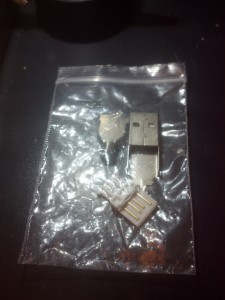
The finished article.
Continue Reading

Fetching MySQL query result in bash

Quick bash script I did for getting result from a MySQL query. It gets a number value from a database and if the number is less than (-lt) it executes another command. You can substitute -lt for -gt (greater than) as required. There are two versions the first executes a command on both pass and fail the second only reports on fail.

Version 1

#!/bin/bash
connections=$(mysql database -se "select count from nodes where status='1';")
if [ $connections -lt 200 ];
then echo "ERROR"
else echo "OK"

fi

Version 2

#!/bin/bash
connections=$(mysql database -se "select count from nodes where status='1';") if [ $connections -lt 200 ];
then echo "ERROR"
fi

Continue Reading

Resetting VMware ESXi Host Root Password

1, Download a Linux live CD (for this how to I used ubuntu and will reference to it) and burn to cd/usb. 2, Ensure your server is set to boot from CD/Usb first via the bios. 3, Boot the linux image and select ‘Try Ubuntu’. 4, When the desktop is loaded launch Gparted. 5, Looking at the layout hypervisor is located on the first 250MB partition in my case /dev/sda5 make a note of this partition. 6, Open a terminal window. 7, Type the following commands sudo -s mount /dev/sda5 /mnt (replace /dev/sda5 with your own parition) cd /mnt ls 8, Copy state.tgz to tmp and extract cp state.tgz /tmp cd /tmp tar xzf state.tgz 9, Going an ‘ls’ shows a new file local.tgz extract this tar xzf local.tgz 10, Go to the /etc directory and edit the shadows file. cd /etc nano shadow Here you’ll find the root password hash surrounded by two colons ie root:$fgEFG5454DFG54t55445DFGDFGDxzfvxdgfrfdret54dfgfdgg45:13358:0:99999:7::: remove the text between the two colons so it shows root::13358:0:99999:7::: save and exit 11, Now we need to repack the files and copy the modified state.tgz back to the ESXi system. cd .. tar czf local.tgz etc tar czf state.tgz local.tgz cp state.tgz /mnt/ umount /mnt 12, type ‘reboot’ and remove the Live CD media and allow VMware to boot as normal. 13, Once booted press ‘F2’ and login with the name root and a blank passsword. 14, Set a new password via the ‘Configure Password’ option.

Continue Reading

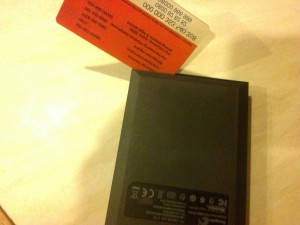
Dissecting the 2TB Seagate Expansion Portable USB 3.0 Drive

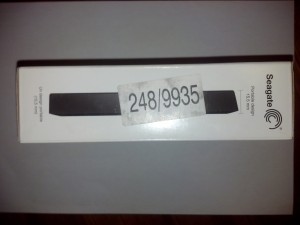
I picked up this USB drive from Argos (item number 248/9935) knowing that the internal drive could be removed and thus installed in a laptop or console ie the PS4. This differs from some others in the fact that it contains a true sata drive with standard sata connectors, other manufacturers use proprietary drive connectors to convert to USB thus removing the ability to use it outside of it’s enclosure.
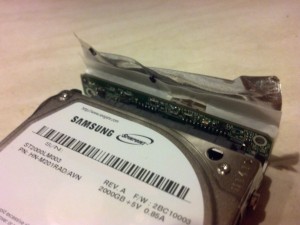
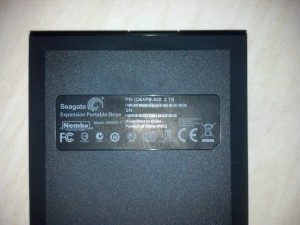
Even though branded as seagate it acutally contains a Samsung M9T 2TB ST2000LM003 9.5mm SATA 2.5 inch Internal Hard Drive Now these sell in a standalone format at around £90 but the expansion combination is regularly on offer for around £55-60. You have to decide whether the £30-£35 saving is worth loosing your warranty. For me money was the biggest factor hence why I went with this.
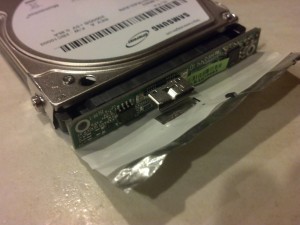
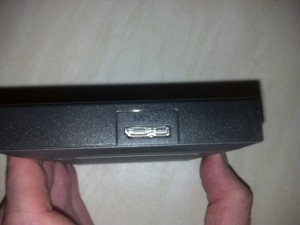
The drive comes with some instructions and a hight speed USB 3.0 cable.


**** WARNING REMOVING THE DRIVE FROM IT’S CASE WILL INVALIDATE YOUR WARRANTY ****

Seagates Warranty And Replacement Policy

If your caeful enough you should be able to salvage the case and use it to put a spare drive in.

First thing I did was plug it into a windows machine to check it’s health status with crystaldiskmark

—————————————————————————-
(2) ST2000LM003 HN-M201RAD
—————————————————————————-
Enclosure : Seagate Expansion USB Device (V=0BC2, P=2312, sa1) – st
Model : ST2000LM003 HN-M201RAD
Firmware : 2BC10003
Serial Number : **************
Disk Size : 2000.3 GB (8.4/137.4/2000.3/2000.3)
Buffer Size : 32767 KB
Queue Depth : 32
# of Sectors : 3907029168
Rotation Rate : 5400 RPM
Interface : USB (Serial ATA)
Major Version : ATA8-ACS
Minor Version : ATA8-ACS version 6
Transfer Mode : SATA/300 | SATA/600
Power On Hours : 0 hours
Power On Count : 5 count
Temperature : 16 C (60 F)
Health Status : Good
Features : S.M.A.R.T., APM, AAM, 48bit LBA, NCQ
APM Level : 0080h [OFF]
AAM Level : FE00h [OFF]

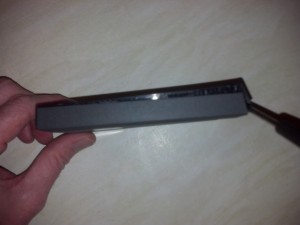
Good enough for me so now time to crack it open. I used a small hobby knife/scalpel and started at the corner where the Seagate logo is.

Once I managed to pry open enough of a gap I used a plastic card to keep it open.

Next I slid the card along and used a small flat headed screwdriver to pry open the end.

Continuing on I managed to open up the case expsoing the clips.

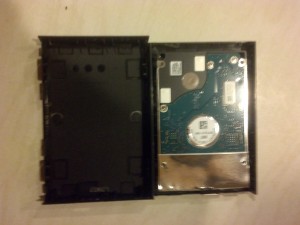
Pulling off the top reveals the drive.

The drives lifts out of the bottom casing

One both sides of the drives are screw covered by black caps.

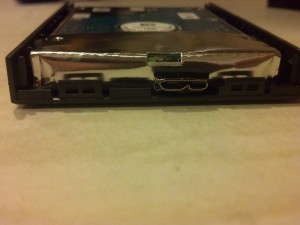
Next carefully peel away the silver foil.

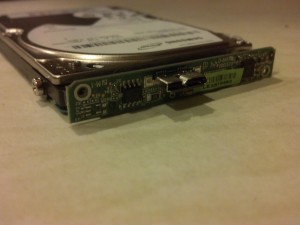
The usb/sata connector is now exposed which simply pulls away from the drive.

Job done you now have a 2TB drive to put into you console or pc.


Continue Reading

Delete specific matching iptables rule

I had the scenario where I needed to allow telnet access from a server to a device which blocked telnet by default, I added the rule on the device using

iptables -I INPUT 1 -p tcp -s 10.10.10.10 --dport 23 -j ACCEPT

Using  INPUT 1 meant it was added as the first rule in iptables thus would be run before the one blocking all telnet. The problem came when it came to deleting rule as there was no easy way to ascertain if new rules had been added to the top of the chain meaning my rule was no longer number 1. To get round this I need to delete the specific rule I had created and this is how I did it. On the device I did

iptables-save |grep 10.10.10.10

this outputted

-A INPUT -s 10.10.10.10/32 -p tcp -m tcp --dport 23 -j ACCEPT

to delete all I needed to do was replace the -A with -D

iptables -D INPUT -s 10.10.10.10 -p tcp -m tcp --dport 23 -j ACCEPT

Obviously tweak to suit your own situation.

Continue Reading